Developing a custom tumbler accessory usually starts long before the mold is opened.
Whether the project involves a silicone boot, lid, handle, straw accessory, gasket, sleeve, valve, or a silicone-plastic assembly, the quality of the initial RFQ directly affects engineering efficiency, tooling accuracy, development time, and final cost.
A supplier can give a much more accurate quotation when the brand provides complete information from the beginning.
Sending only a product photo and asking, “How much does this cost?” usually leads to repeated questions, rough estimates, and unnecessary revisions.
Before opening a mold, drinkware brands, importers, private-label sellers, and OEM buyers should prepare the following information.
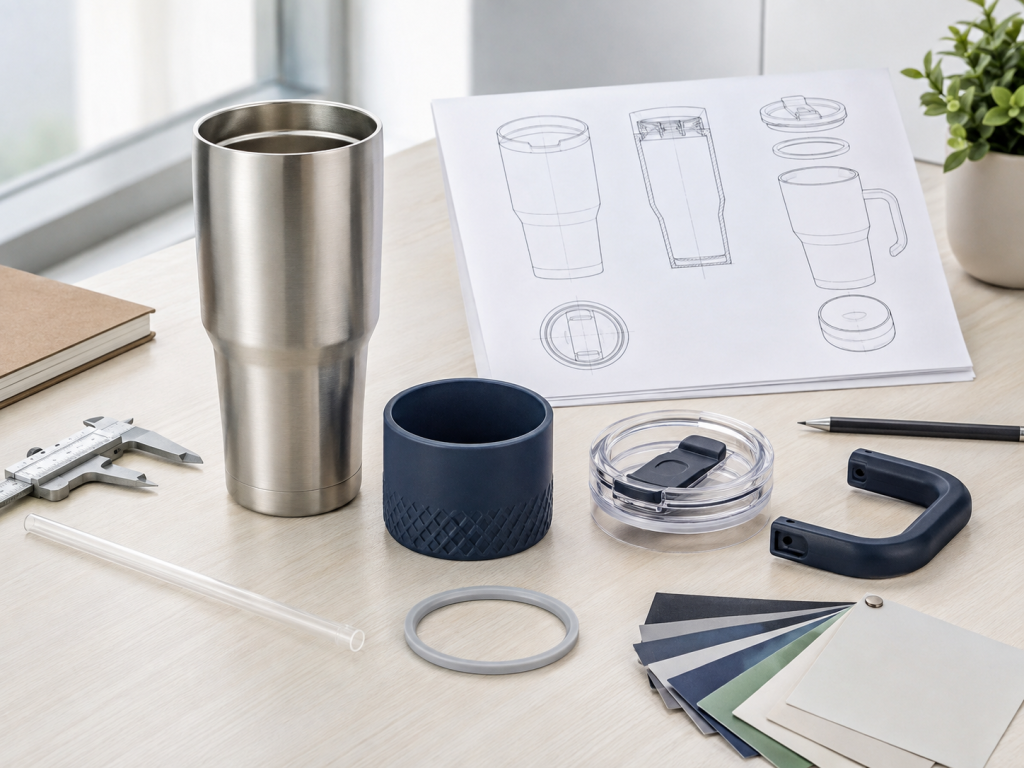
Why a Complete RFQ Matters
Custom tumbler accessories often involve several interacting requirements:
- Tumbler dimensions
- Product fit
- Silicone hardness
- Plastic material
- Color
- Surface texture
- Logo
- Leak resistance
- Assembly
- Packaging
- Production quantity
If one requirement changes after tooling has started, the mold may need modification.
In some cases, a major dimensional or structural change may require a completely new mold.
A well-prepared RFQ helps the supplier evaluate manufacturability before tooling begins.
It can also reduce:
- Tooling revisions
- Quotation uncertainty
- Sampling delays
- Material mistakes
- Fit problems
- Assembly issues
- Unexpected production cost
1. Tell the Supplier What Product You Are Developing
Start with a clear description of the accessory.
For example:
- Silicone tumbler boot
- Silicone sleeve
- Replacement gasket
- Straw topper
- Straw seal
- Tumbler handle
- Plastic lid
- Silicone-plastic lid component
- Anti-slip cup base
- Custom valve
- Multi-part drinkware assembly
If the project is part of a complete tumbler system, explain how the component is used.
A supplier needs to understand whether the part is decorative, protective, structural, sealing, or functional.
2. Send a 2D Technical Drawing
A 2D drawing is one of the most useful documents for quotation and engineering review.
It should ideally include:
- Overall dimensions
- Critical dimensions
- Tolerances
- Wall thickness
- Hole diameter
- Groove dimensions
- Radius
- Draft requirements
- Surface requirements
- Logo position
PDF is commonly used for quotation review.
If some dimensions are more important than others, mark them clearly.
For example, on a silicone tumbler boot, the inner diameter and boot height may directly affect fit.
On a gasket, the cross-section and sealing diameter may be critical.
3. Send a 3D CAD File
For complex parts, a 3D model significantly improves engineering communication.
Common formats include:
- STEP
- STP
- IGES
- IGS
- Parasolid
A 3D model is especially useful for:
- Custom tumbler lids
- Handles
- Multi-level silicone parts
- Snap-fit structures
- Overmolded components
- Complex sleeves
- Insert-molded parts
It allows the supplier to review:
- Undercuts
- Draft
- Mold opening direction
- Wall thickness
- Parting lines
- Slides and lifters
- Assembly features
For complex custom projects, sending both 2D and 3D files is recommended.
4. Send the Actual Tumbler Sample
For accessories that must fit an existing cup, a physical sample is extremely valuable.
Examples include:
- Silicone boots
- Replacement lids
- Handles
- Sleeves
- Gaskets
- Straw systems
The supplier can use the sample to verify:
- Actual dimensions
- Surface finish
- Cup taper
- Thread structure
- Bottom geometry
- Assembly method
- Fit requirements
This is especially important because advertised cup capacities such as 20 oz, 30 oz, or 40 oz do not define actual product dimensions.
Two tumblers with the same capacity can have completely different shapes.
5. Provide Exact Tumbler Dimensions
If a physical sample is not available, provide detailed dimensions.
Depending on the accessory, important measurements may include:
- Cup bottom diameter
- Top diameter
- Cup opening diameter
- Taper angle
- Thread dimensions
- Rim geometry
- Handle mounting area
- Bottom radius
- Lid interface dimensions
Do not rely only on nominal cup size.
A statement such as “for a 40 oz tumbler” is not enough for custom tooling.
6. Specify the Target Material
Tell the manufacturer whether the component should be made from:
- Silicone rubber
- LSR
- PP
- PC
- Other plastic
- Silicone + plastic
- Silicone + metal
If the material has not been finalized, explain the application instead.
For example:
- Food-contact use
- High flexibility
- Dishwasher exposure
- Anti-slip performance
- High transparency
- High stiffness
- Soft-touch grip
- Repeated bending
The supplier can then recommend suitable material options.
7. Specify Silicone Hardness
For silicone parts, hardness affects both fit and user experience.
Common ranges may include:
- 30 Shore A
- 40 Shore A
- 50 Shore A
- 60 Shore A
- 70 Shore A
Hardness influences:
- Flexibility
- Installation
- Compression
- Grip
- Shape retention
- Tear resistance
- Sealing behavior
For example, a silicone boot that is too hard may be difficult to install.
A gasket that is too soft may deform excessively.
If the correct hardness is unknown, provide the application and allow the manufacturer to recommend a starting range.
8. Define Color Requirements
Color is especially important for consumer drinkware accessories.
Provide:
- Pantone number
- Existing color sample
- Brand color standard
- Transparency requirement
- Matte or glossy preference
Possible options include:
- Solid color
- Transparent
- Translucent
- Two-color
- Multi-component color combinations
Physical color samples are often more reliable than screenshots because screen displays can vary.
9. Define Surface Texture
Surface finish can significantly affect appearance and grip.
Common options include:
- Smooth
- Matte
- Fine texture
- Grain texture
- Raised dots
- Ribs
- Geometric patterns
For silicone boots and sleeves, texture can also influence:
- Anti-slip performance
- Dust visibility
- Hand feel
- Brand differentiation
Texture requirements should be discussed before mold fabrication because many textures are created directly in the tooling.
10. Provide Logo and Branding Requirements
If the accessory requires a logo, provide the original vector artwork if possible.
Common file formats include:
- AI
- EPS
- SVG
Branding options may include:
- Embossed logo
- Debossed logo
- Printed logo
- Laser marking
- Color-filled logo
- Molded decorative elements
The supplier should know the logo requirements before tooling because molded logos are normally built directly into the mold.
Changing the logo later can require mold modification.
11. Explain the Product Function
A custom accessory should not be evaluated based only on appearance.
Explain what the part needs to do.
For example:
Silicone Boot
Required functions may include:
- Anti-slip
- Scratch protection
- Drop protection
- Noise reduction
Lid Gasket
Required functions may include:
- Leak prevention
- Easy removal
- Dishwasher resistance
- Long-term compression
Handle
Required functions may include:
- Carrying a full tumbler
- Comfortable grip
- Repeated loading
- Impact resistance
Straw Seal
Required functions may include:
- Holding the straw
- Reducing splashing
- Maintaining low insertion force
Functional information helps the supplier review the structure more accurately.
12. Define Leak or Splash Resistance Requirements
If the product includes a lid, gasket, valve, or straw seal, define the expected sealing level.
Examples include:
- Splash resistant
- Spill resistant
- Leak resistant
- Suitable for upright transport
- Fully closed bottle-style sealing
These terms should not be treated as identical.
A straw tumbler with an open drinking path usually has different sealing behavior from a completely closed bottle.
The supplier should know what testing will be required.
13. Explain How the Product Will Be Assembled
For multi-part components, explain the intended assembly.
Possible methods include:
- Manual assembly
- Snap-fit
- Press-fit
- Screw connection
- Insert molding
- Silicone overmolding
- Adhesive bonding
- Mechanical locking
The assembly process affects component tolerances and tooling design.
If the supplier will also provide final assembly, this should be included in the RFQ.
14. Specify Quantity
Production quantity has a major effect on quotation.
Provide:
- Prototype quantity
- First order quantity
- Expected annual volume
For example:
Prototype: 20 pcs
First order: 5,000 pcs
Annual demand: 100,000 pcs
Production volume influences:
- Mold cavity count
- Tooling grade
- Production method
- Automation
- Unit cost
- Mold life
A mold for 2,000 parts per year may be very different from one designed for several million parts.
15. Share the Target Price When Appropriate
For new product development, a realistic target price can help the supplier recommend a suitable manufacturing solution.
For example, the supplier may suggest:
- Simplifying the structure
- Reducing unnecessary components
- Changing material
- Adjusting wall thickness
- Reducing decorative processes
- Changing the mold cavity strategy
Target pricing is especially useful when the product is being developed for a competitive retail market.
16. Define Compliance Requirements
Tell the supplier which regulations or test requirements apply to the project.
Depending on the product and market, buyers may request:
- Food-contact material requirements
- FDA-related requirements
- LFGB-related requirements
- RoHS
- REACH
- BPA-related requirements
- California Proposition 65-related requirements
- Customer-specific restricted substance standards
The exact requirement should be confirmed according to the target market and product.
Do not wait until mass production to communicate compliance expectations.
17. Define Quality Inspection Requirements
Before mold development, specify how the finished product will be inspected.
Possible requirements include:
- Dimensional inspection
- Appearance inspection
- Fit testing
- Leak testing
- Hardness testing
- Color inspection
- Assembly testing
- Functional testing
Critical dimensions should be identified on the drawing.
Not every dimension needs extremely tight tolerance.
Unnecessary tight tolerance can increase tooling, inspection, and production cost.
18. Define Packaging Requirements
Packaging is often forgotten during the first RFQ.
However, packaging can significantly affect total project cost.
Possible options include:
- Bulk bags
- Individual polybags
- Printed bags
- Paper boxes
- Retail packaging
- Barcode labels
- Amazon-style labeling
- Custom inserts
- Master cartons
If the supplier is expected to provide finished retail packaging, send packaging artwork and packing specifications early.
19. Tell the Supplier Your Target Market
Knowing the target market can help the supplier understand expected quality and compliance requirements.
Examples include:
- United States
- European Union
- Japan
- South Korea
- Australia
- Middle East
- Global retail
The product may need different documentation or testing depending on where it will be sold.
20. Provide Reference Products Carefully
Reference products can help explain design direction.
You may send:
- Photos
- Existing samples
- Competitor examples
- Functional references
However, reference products should be used to communicate:
- Shape
- User experience
- Function
- Texture
- Size
Custom projects should avoid directly copying protected designs, trademarks, or patented structures.
A better approach is to develop an original structure based on the required function.
21. Explain Whether the Design Is Final
Tell the supplier which stage the project is in.
For example:
Concept Stage
The brand only has an idea or sketch.
Engineering Stage
The 3D model exists but still requires DFM review.
Prototype Stage
The structure has been tested but needs manufacturing optimization.
Production Stage
The design is finalized and ready for tooling.
The supplier’s engineering approach will be different at each stage.
22. Ask for DFM Review Before Tooling
DFM stands for Design for Manufacturing.
Before mold fabrication, the supplier should review whether the part can be manufactured reliably.
A DFM review may examine:
- Wall thickness
- Draft angles
- Undercuts
- Parting lines
- Gate locations
- Demolding
- Flash
- Logo location
- Snap fits
- Tooling structure
- Silicone deformation
- Injection molding risks
This step can prevent expensive changes later.
23. Prototype Before Opening Production Tooling
For new designs, prototypes can reduce risk.
Depending on the component, prototype options may include:
- 3D printing
- CNC machining
- Soft tooling
- Prototype silicone molds
- Sample injection molds
Prototype testing can verify:
- Fit
- Size
- Ergonomics
- Appearance
- Mechanism
- Assembly
For fit-critical silicone accessories, prototype tooling may sometimes be more useful than rigid 3D prints because actual silicone flexibility affects performance.
24. Fit Testing Is Essential
Accessories that fit existing tumblers should always be tested with the actual cup.
Examples include:
- Boots
- Sleeves
- Lids
- Gaskets
- Handles
- Straw systems
Check:
- Installation force
- Removal force
- Stability
- Gap
- Rotation
- Leakage
- Interference
The best digital model cannot fully replace physical fit testing.
25. Confirm Samples Before Mass Production
Before production approval, check the sample carefully.
A typical approval process may include:
- Dimensions
- Color
- Hardness
- Texture
- Fit
- Logo
- Function
- Surface quality
- Assembly
- Packaging
Do not approve a sample based only on photos if fit and function are critical.
A Good Tumbler Accessory RFQ Example
A complete RFQ could look like this:
Product: Custom silicone boot for stainless-steel tumbler
Cup size: 40 oz
Cup bottom OD: 76.5 mm
Boot height: 45 mm
Material: Food-contact silicone
Hardness: 50 ±5 Shore A
Color: Pantone 2925 C
Surface: Matte
Bottom: Anti-slip radial texture
Logo: Debossed logo
Drawing: PDF attached
3D: STEP attached
Sample: Physical tumbler available
First order: 10,000 pcs
Annual volume: Approximately 100,000 pcs
Target market: United States
Requirements: Project-specific food-contact and compliance documentation
Packaging: 100 pcs per inner carton, bulk packing
This information gives the supplier a much stronger basis for quotation and mold evaluation.
Common RFQ Mistakes to Avoid
Sending Only a Photo
A photo cannot accurately define dimensions, tolerance, material, or fit.
Saying Only “Fits a 40 oz Tumbler”
Cup capacity does not define the actual geometry.
Not Sending the Cup Sample
For fit-critical accessories, a sample can significantly reduce development risk.
No Quantity Information
Without volume, the supplier cannot properly evaluate mold structure or unit cost.
Changing the Logo After Tooling
If the logo is molded into the part, changes may require mold modification.
Changing Hardness After Sample Approval
Hardness can change fit and function, especially for silicone parts.
Ignoring Packaging Until the End
Retail packaging can affect both cost and production planning.
Information Checklist Before Opening a Mold
Before approving tooling, make sure the following information is confirmed:
- Product type
- 2D drawing
- 3D CAD file
- Physical tumbler sample
- Critical dimensions
- Silicone or plastic material
- Silicone hardness
- Color
- Surface texture
- Logo
- Functional requirements
- Leak or splash requirements
- Assembly method
- First order quantity
- Annual volume
- Target market
- Compliance requirements
- Inspection requirements
- Packaging
- Approved DFM
- Approved prototype or design
Once these details are stable, tooling development becomes much more predictable.
Custom Tumbler Accessory Development
SiliconeTumblerAccessories supports custom OEM/ODM projects for drinkware components including:
- Silicone tumbler boots
- Silicone sleeves
- Tumbler gaskets
- Lid seals
- Straw accessories
- Straw toppers
- Silicone valves
- Plastic lids
- Tumbler handles
- Silicone + plastic assemblies
- Custom overmolded components
Project support can include:
- Drawing review
- DFM analysis
- Material recommendations
- Hardness selection
- Color matching
- Prototype development
- Mold design
- Silicone molding
- LSR injection molding
- Plastic injection molding
- Assembly
- Inspection
- Custom packaging
For faster engineering review and quotation, send your drawings, cup dimensions, physical sample, target material, expected quantity, and functional requirements before tooling begins.
FAQ
Can I request a custom tumbler accessory without a drawing?
Yes. A physical tumbler sample, reference product, sketch, and key dimensions can be used to start the discussion. However, engineering drawings are normally required before final mold development.
Should I send my actual tumbler to the manufacturer?
For fit-critical products such as boots, lids, sleeves, and gaskets, sending the actual production cup is highly recommended.
Why does the supplier need annual quantity before quoting?
Annual demand affects mold cavity count, tooling structure, production method, automation, and unit cost.
Can a supplier develop a silicone accessory from an existing cup?
Yes. The existing cup can be measured and evaluated to develop a custom-fit accessory.
Should I approve a 3D design before mold fabrication?
Yes. The structure, dimensions, logo, texture, and key functional details should be approved before tooling.
What happens if I change the design after the mold is opened?
Minor changes may sometimes be handled through mold modification, but major dimensional or structural changes may require new tooling. This is why DFM and sample validation are important before tooling begins.